-1280x720.jpg)

目標
- Flaskのルーティングを利用した小規模アプリを作成できる。
ルーティングの利用
ルーティングの利用
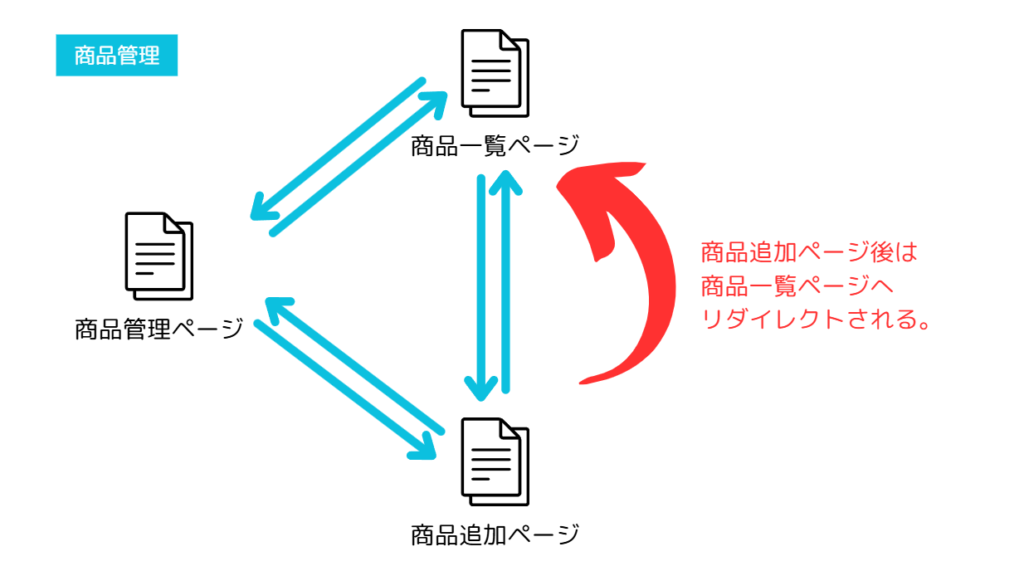
Part.3までに作成したminiappアプリに「商品管理ページ」「商品追加ページ」を作成して、次のページ遷移を実装します。但し、ここでもデータベースの利用は行わず、Jinja2を利用した表示部分とそれぞれのページに関わるルーティング部分の作成のみを行います。
- 商品管理ページと商品一覧ページは双方向へ遷移可能。
- 商品管理ページと商品追加ページは双方向へ遷移可能。
- 商品一覧ページと商品追加ページは双方向へ遷移可能。
- 商品追加を行った後は商品一覧ページへリダイレクトされる。
テンプレートファイルの作成
必要なテンプレートを準備します。テンプレート名は次の通りです。テンプレートファイルは「templates」ディレクトリに配置します。
- 商品管理ページ…manage_products.html
- 商品追加ページ…add_product.html
それぞれの記述内容は次の通りです。
manage_products.html
<!DOCTYPE html>
<html lang="ja">

<head>
    <meta charset="UTF-8">
    <meta name="viewport" content="width=device-width, initial-scale=1.0">
    <title>商品管理</title>
    <link rel="stylesheet" href="{{ url_for('static', filename='css/style.css') }}">
</head>

<body>
    <h1>商品管理ページ</h1>
    <ul>
        <li><a href="{{ url_for('product_list') }}" class="button-link">商品一覧</a></li>
        <li><a href="{{ url_for('add_product') }}" class="button-link">商品追加</a></li>
    </ul>
</body>

</html>
add_product.html
<!DOCTYPE html>
<html lang="ja">

<head>
    <meta charset="UTF-8">
    <meta name="viewport" content="width=device-width, initial-scale=1.0">
    <title>商品追加</title>
    <link rel="stylesheet" href="{{ url_for('static', filename='css/style.css') }}">
</head>

<body>

    <h1>商品追加ページ</h1>
    <ul>
        <li><a href="{{ url_for('product_list') }}" class="button-link">商品一覧に戻る</a></li>
        <li><a href="{{ url_for('manage_products') }}" class="button-link">商品管理ページ</a></li>
    </ul>

    <h1>商品追加フォーム</h1>

    <form method="POST" action="{{ url_for('add_product') }}">
        <label for="name">商品名</label>
        <input type="text" id="name" name="name" placeholder="商品名を入力" required>

        <label for="price">価格</label>
        <input type="number" id="price" name="price" placeholder="価格を入力" required>

        <input type="submit" value="商品を追加する">
    </form>

</body>

</html>
products.htmlを次のように編集します。
<!DOCTYPE html>
<html lang="ja">

<head>
    <meta charset="UTF-8">
    <meta name="viewport" content="width=device-width, initial-scale=1.0">
    <title>商品一覧</title>
    <link rel="stylesheet" href="{{ url_for('static', filename='css/style.css') }}">
</head>

<body>
    <h1>商品一覧ページ</h1>
    <ul>
        <li><a href="{{ url_for('add_product') }}" class="button-link">商品を追加する</a></li>
        <li><a href="{{ url_for('manage_products') }}" class="button-link">商品管理ページ</a></li>
    </ul>


    <h1>商品一覧</h1>
    <ul>
        {% for product in products %}
        <li>{{ product.name }} : ¥{{ "{:,}".format(product.price) }}</li>
        {% endfor %}
    </ul>

</body>

</html>
style.cssを次のように編集します。
body {
    font-family: Arial, sans-serif;
    margin: 20px;
    padding: 20px;
    background-color: #f8f8f8;
}

h1 {
    color: #333;
}

/* ボタン部分のリストを横並びにする */
ul {
    padding: 0;
}

ul:first-of-type {
    /* 横並び */
    display: flex;
    /* 左寄せ */
    justify-content: flex-start;
}

ul:first-of-type li {
    /* ボタン間に余白 */
    margin-right: 10px;
}

/* リストアイテムの基本スタイル */
li {
    /* デフォルトのリストスタイルを削除 */
    list-style-type: none;
}

/* ボタンリンクのスタイル */
.button-link {
    display: block;
    padding: 10px 20px;
    background-color: #4CAF50;
    color: white;
    text-decoration: none;
    border-radius: 5px;
    font-size: 16px;
    transition: background-color 0.3s ease;
}

/* ボタンにホバーしたときのスタイル */
.button-link:hover {
    background-color: #45a049;
}

/* 商品リストのスタイル */
h2 {
    /* 商品リストの見出しに余白 */
    margin-top: 30px;
}

ul:nth-of-type(2) {
    /* 商品リストのマーカーを削除 */
    list-style-type: none;
    padding: 0;
}

ul:nth-of-type(2) li {
    background-color: #fff;
    padding: 10px;
    margin: 5px 0;
    border-radius: 5px;
    box-shadow: 0 2px 4px rgba(0, 0, 0, 0.1);
}

/* フォーム全体のスタイル */
form {
    background-color: #fff;
    padding: 20px;
    border-radius: 5px;
    box-shadow: 0 2px 4px rgba(0, 0, 0, 0.1);
    margin-top: 30px;
}

/* フォーム内のラベルのスタイル */
form label {
    font-size: 16px;
    color: #333;
    display: block;
    margin-bottom: 8px;
}

/* フォーム内の入力フィールドのスタイル */
form input[type="text"],
form input[type="number"],
form input[type="submit"] {
    width: 100%;
    padding: 10px;
    margin-bottom: 15px;
    border: 1px solid #ddd;
    border-radius: 5px;
    font-size: 16px;
    box-sizing: border-box;
}

/* フォーム内のボタン(送信ボタン) */
form input[type="submit"] {
    background-color: #4CAF50;
    color: white;
    cursor: pointer;
    transition: background-color 0.3s ease;
}

/* 送信ボタンにホバーしたときのスタイル */
form input[type="submit"]:hover,
form button:hover {
    background-color: #45a049;
}
ルーティングの作成(app.pyの編集)
app.pyファイルを次のように編集します。
from flask import Flask, redirect, render_template, request, url_for

app = Flask(__name__)

# 商品リスト
products = [
    {"id": 1, "name": "オレンジジュース", "price": 140},
    {"id": 2, "name": "アップルジュース", "price": 150},
    {"id": 3, "name": "牛乳", "price": 180},
]


@app.route("/")
def index():
    return "Top page"


@app.route("/products")
def product_list():
    return render_template("products.html", products=products)


@app.route("/add_product", methods=["GET", "POST"])
def add_product():
    if request.method == "POST":
        # フォームから送られたデータを取得
        name = request.form["name"]
        price = int(request.form["price"])

        # 新しい商品を追加
        new_id = len(products) + 1
        products.append({"id": new_id, "name": name, "price": price})

        # 商品一覧ページにリダイレクト
        return redirect(url_for("product_list"))

    return render_template("add_product.html")


@app.route("/manage_products")
def manage_products():
    # 商品管理ページを表示
    return render_template("manage_products.html")


if __name__ == "__main__":
    app.run(debug=True)
ファイルの作成、修正後は、エクスプローラで次のように表示されます。

作業が完了したら、稼働して動きを確認します。
アプリケーションの起動
環境変数を有効化して「flask run」コマンドを実行します。
# 仮想環境を有効化します。
C:\Users\user\Desktop\FlaskProj>.venv\Scripts\activate

# 仮想環境が有効化されます。
(venv) C:\Users\user\Desktop\FlaskProj>

# サーバーを起動します。
(venv) C:\Users\user\Desktop\FlaskProj>flask run
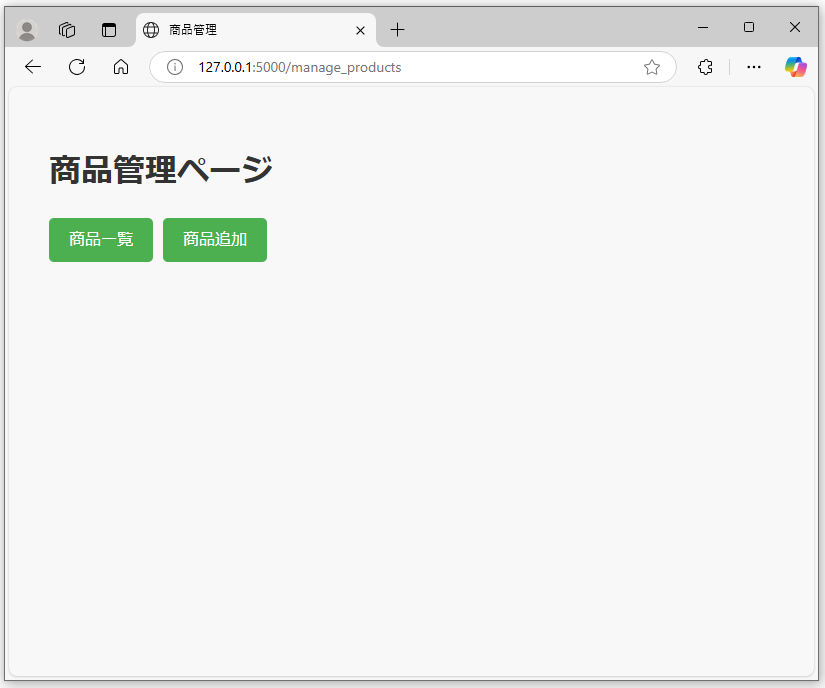
ブラウザで http://127.0.0.1:5000/manage_productsにアクセスします。
商品管理ページが表示されます。
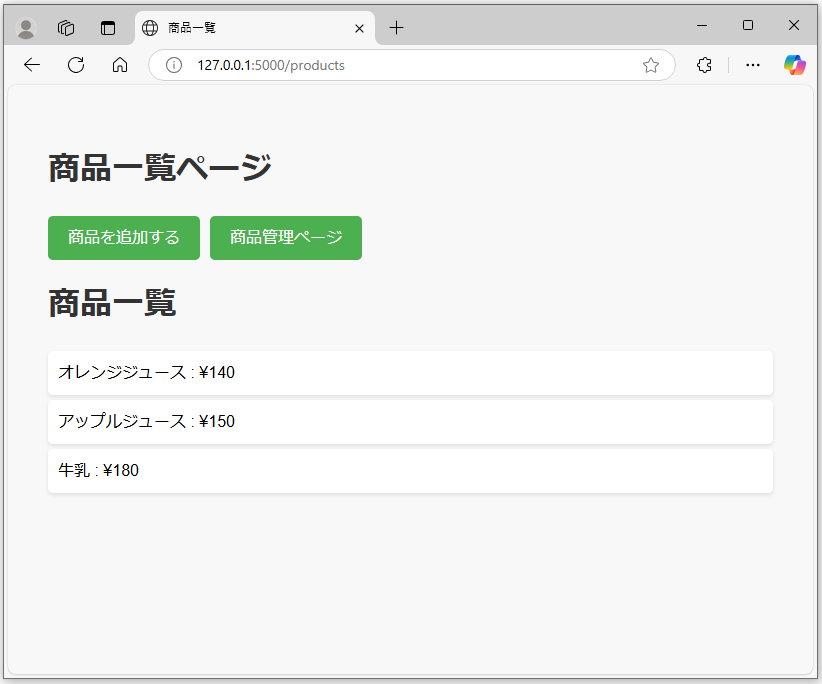
商品一覧ボタンを押下すると、商品一覧ページが表示されます。
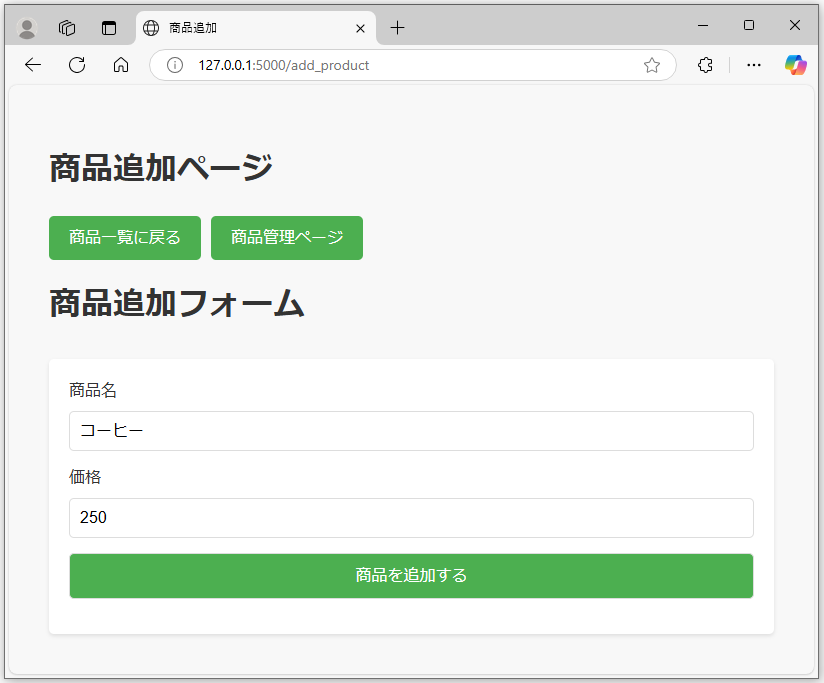
商品を追加するボタンを押下すると、商品追加ページが表示されます。

商品名と価格を入力して「商品を追加する」ボタンを押下します。
http://127.0.0.1:5000/products にリダイレクトされます。
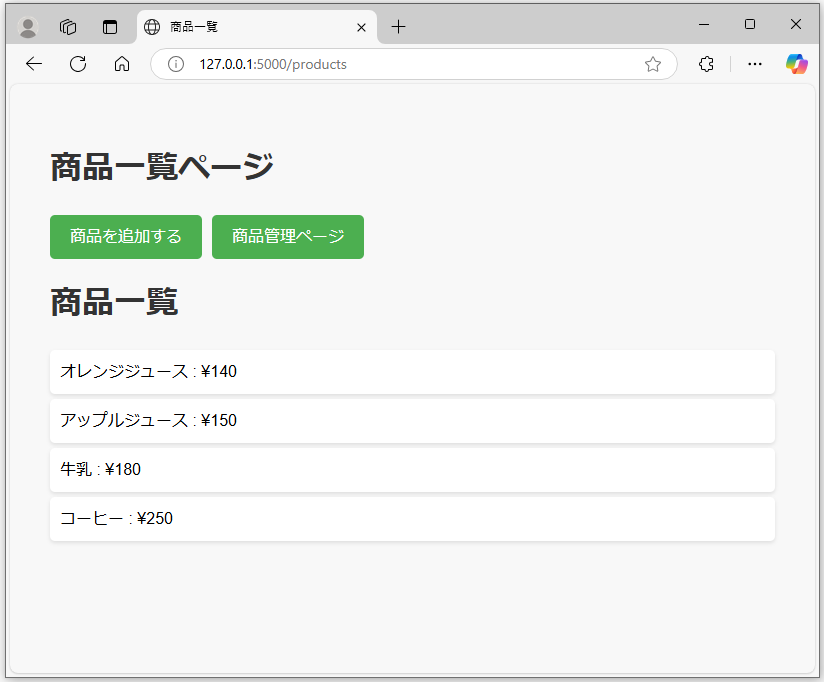
商品が追加されています。
今回は以上になります。
ここでは、入力フォームの作成、複数ルーティングの設定、リダイレクトの設定を行っています。次回以降の記事で、これらについて確認します。


ブックマークのすすめ
「ほわほわぶろぐ」を常に検索するのが面倒だという方はブックマークをお勧めします。ブックマークの設定は別記事にて掲載しています。

-640x360.jpg)

-640x360.jpg)

-640x360.jpg)
-640x360.jpg)

カスタム調査とシンジケートデータ-320x180.png)
帰無仮説と対立仮設・有意水準・P値・z検定-320x180.png)
準実験:合成コントロール法-320x180.jpg)
準実験:回帰不連続デザイン(RDD)-320x180.jpg)
準実験:傾向スコアマッチング(PSM)-320x180.jpg)