Flask(Part.15)| 【見た目の統一化(1)】
-1280x720.jpg)

目標
- 見た目を統一して、システムのユーザービリティを高めることができる。
- render_template() と {{ title }} を利用した値の呼び出しができる。
- Ruleの変更(ルートのURLルールを変更)を行える。
- フォームクラスでSubmitFieldを利用できる。
Flaskアプリケーションのレイアウト
見た目を統一して、システムのユーザービリティを高める
前回までで作成したアプリケーションでは、ページごとのボタンの配置に統一感がなく、ユーザーの操作に混乱が生じる可能性がありました。具体的には商品一覧ページでは「商品を追加する」ボタンが左にあり、「商品管理ページ」ボタンが右にあるのに対して、カテゴリー一覧ページでは「カテゴリーを追加」ボタンが右にあり、「商品管理ページ」ボタンが左にありました。
また、「商品を追加する」と「カテゴリーを追加」のように、文言も不均一でしたし、各ページの「〇〇ページ(例:商品一覧ページ)」といったタイトルが、ブラウザのタブに表示されるタイトルや、すぐ下に表示される「商品一覧」と重複していることから不必要な表示であることも考える必要があります。
この記事では、それらに一定のルールを設けて、見た目を統一していきます。
manage_products.html
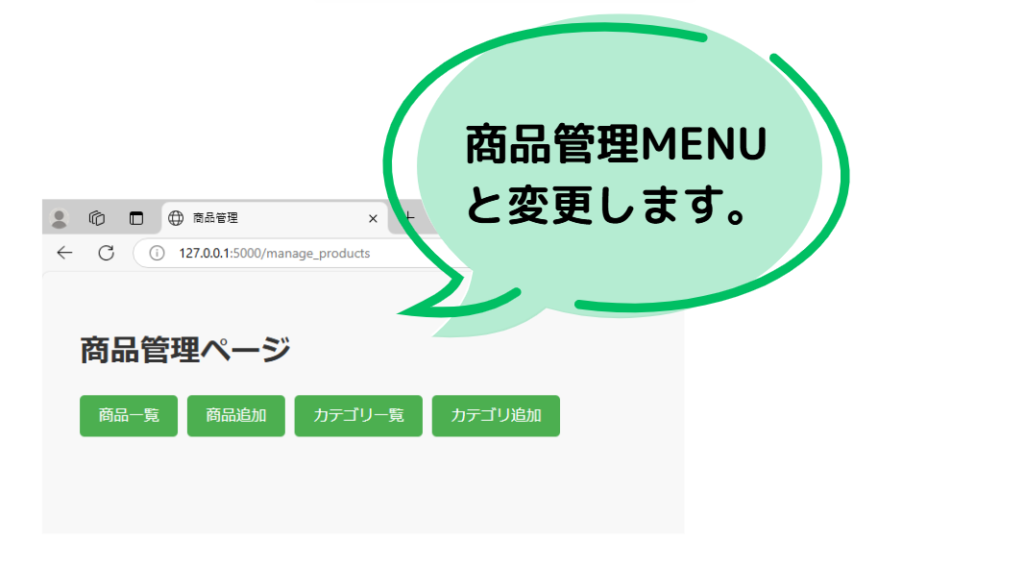
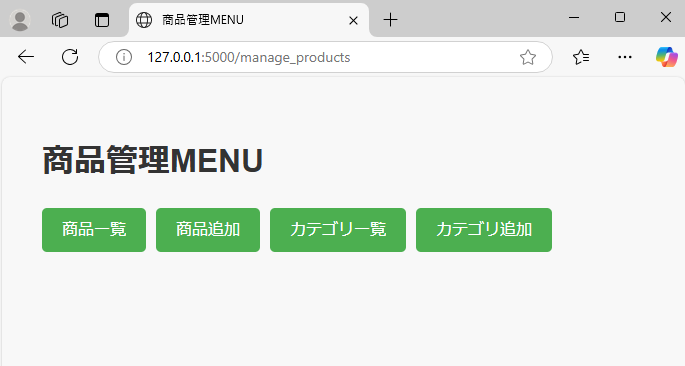
ブラウザの<title>タグ部分は見出し<h1>タグ部分と揃えます(商品管理MENU)。この部分はapp.pyにある render_template() のtitle引数に指定し、テンプレート側で{{ title }}で読み込みます。
app.py
# ルート: 商品管理ページ
@app.route("/manage_products")
def manage_products():
    return render_template("manage_products.html", title="商品管理MENU")
manage_products.html
<!DOCTYPE html>
<html lang="ja">

<head>
    <meta charset="UTF-8">
    <meta name="viewport" content="width=device-width, initial-scale=1.0">
    <title>{{ title }}</title>
    <link rel="stylesheet" href="{{ url_for('static', filename='css/style.css') }}">
</head>

<body>
    <h1>{{ title }}</h1>
    <ul>
        <li><a href="{{ url_for('product_list') }}" class="button-link">商品一覧</a></li>
        <li><a href="{{ url_for('add_product') }}" class="button-link">商品追加</a></li>
        <li><a href="{{ url_for('category_list') }}" class="button-link">カテゴリ一覧</a></li>
        <li><a href="{{ url_for('add_category') }}" class="button-link">カテゴリ追加</a></li>
    </ul>
</body>

</html>
変更後の表示
products.html
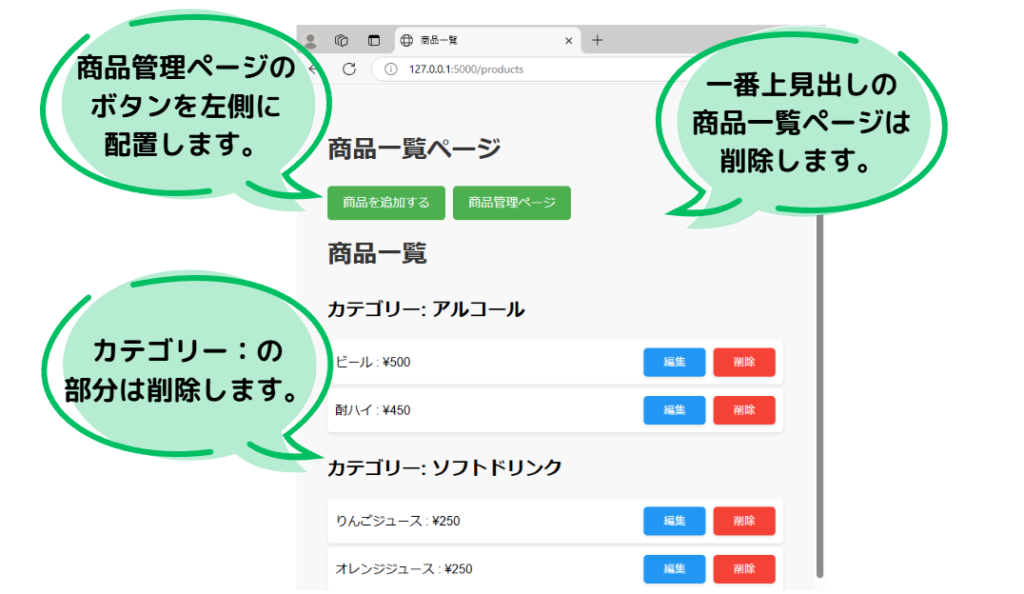
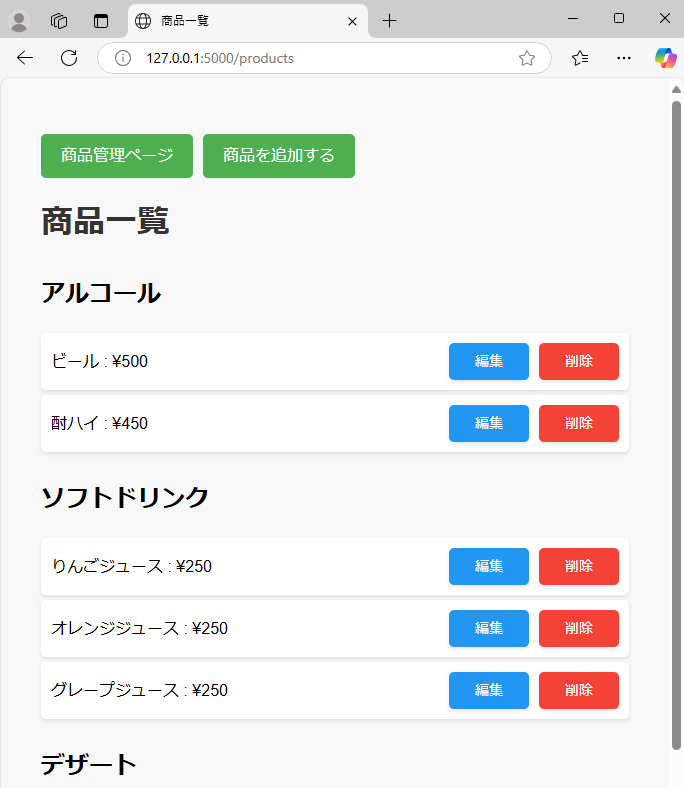
ブラウザの<title>タグ部分は見出し<h1>タグ部分と揃えます(商品一覧)。この部分はapp.pyにある render_template() のtitle引数に指定し、テンプレート側で{{ title }}で読み込みます。
app.py
# ルート: 商品一覧ページ
@app.route("/products")
def product_list():
    products = Product.query.all()  # SQLiteから商品データを取得
    # 商品をカテゴリーごとにグループ化
    grouped_products = {}
    for key, group in groupby(
        sorted(products, key=lambda p: p.category.name if p.category else "なし"),
        key=lambda p: p.category.name if p.category else "なし",
    ):
        grouped_products[key] = list(group)

    return render_template(
        "products.html", grouped_products=grouped_products, title="商品一覧"
    )
products.html
<!DOCTYPE html>
<html lang="ja">

<head>
    <meta charset="UTF-8">
    <meta name="viewport" content="width=device-width, initial-scale=1.0">
    <title>{{ title }}</title>
    <link rel="stylesheet" href="{{ url_for('static', filename='css/style.css') }}">
</head>

<body>
    <ul>
        <li><a href="{{ url_for('manage_products') }}" class="button-link">商品管理ページ</a></li>
        <li><a href="{{ url_for('add_product') }}" class="button-link">商品を追加する</a></li>
    </ul>

    <h1>{{ title }}</h1>

    {% for category, products in grouped_products.items() %}
    <h2>{{ category }}</h2>
    <ul class="product-list">
        {% for product in products %}
        <li class="product-item">
            <span class="product-name">{{ product.name }} : ¥{{ "{:,}".format(product.price) }}</span>
            <div class="button-group">
                <form action="{{ url_for('edit_product', product_id=product.id) }}" method="GET"
                    style="display:inline;">
                    <button type="submit" class="edit-button">編集</button>
                </form>
                <form action="{{ url_for('delete_product', product_id=product.id) }}" method="POST"
                    style="display:inline;">
                    <button type="submit" class="delete-button"
                        onclick="return confirm('本当に削除しますか?※既に注文で利用されている場合は削除できません。')">削除</button>
                </form>
            </div>
        </li>
        {% endfor %}
    </ul>
    {% endfor %}

</body>

</html>
変更後の表示
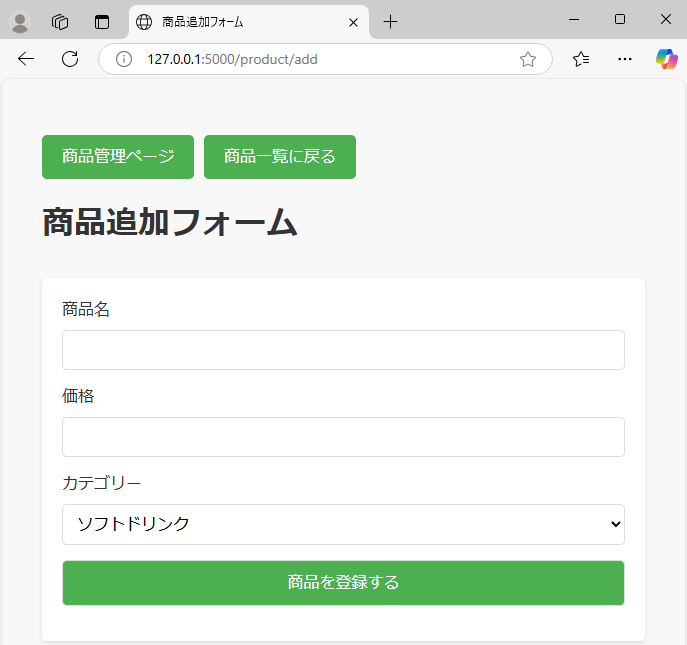
products_form.html
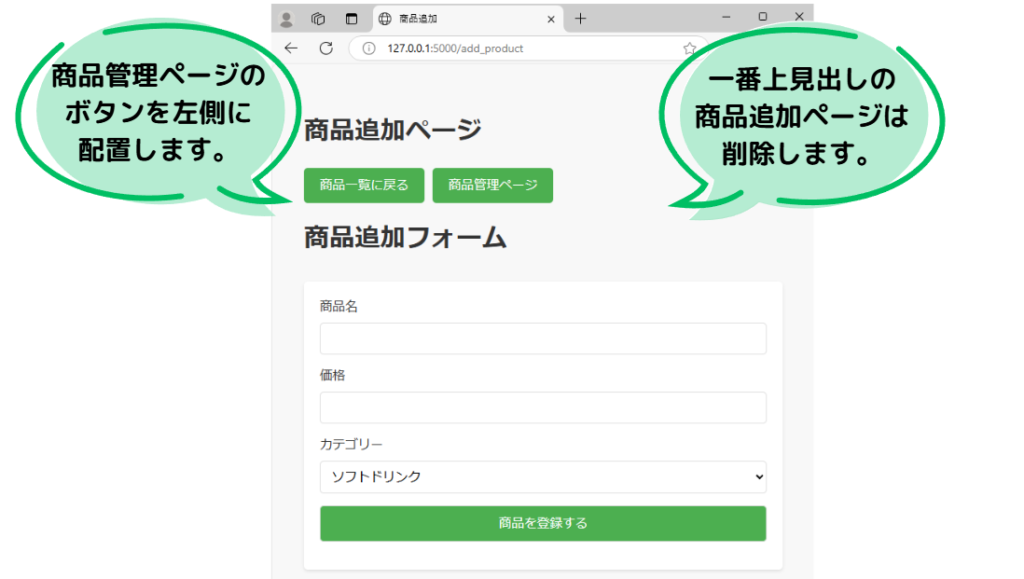
ブラウザの<title>タグ部分は見出し<h1>タグ部分と揃えます(商品追加フォーム)。この部分はapp.pyにある render_template() のtitle引数に指定し、テンプレート側で{{ title }}で読み込みます。
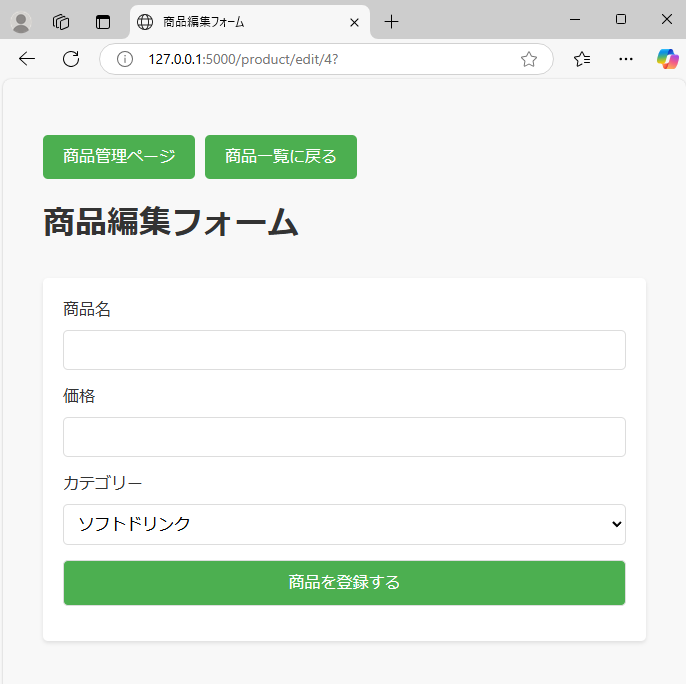
また、商品編集の場合は商品リストから編集ボタンをクリックすることで編集用のフォームが表示されます。この部分も「商品追加フォーム」とあわせる形で「商品編集フォーム」にします。これはapp.pyファイルのedit_product関数にある render_template() のtitle引数を編集するだけです。
app.py
# ルート: 商品追加ページ
@app.route("/add_product", methods=["GET", "POST"])
def add_product():
    form = AddProductForm()
    form.set_category_choices()  # カテゴリーリストを設定

    if form.validate_on_submit():
        # フォームが送信され、バリデーションが成功した場合
        name = form.product_name.data
        price = form.product_price.data
        category_id = form.category.data

        # 新しい商品をデータベースに追加
        new_product = Product(name=name, price=price, category_id=category_id)
        db.session.add(new_product)  # セッションに追加
        db.session.commit()  # データベースにコミット

        # 商品一覧ページにリダイレクト
        return redirect(url_for("product_list"))

    return render_template("product_form.html", form=form, title="商品追加フォーム")


# ルート: 商品を編集
@app.route("/product/edit/<int:product_id>", methods=["GET", "POST"])
def edit_product(product_id):
    product = Product.query.get_or_404(product_id)
    form = AddProductForm(obj=product)
    form.set_category_choices()  # カテゴリーリストを設定

    if form.validate_on_submit():
        product.name = form.product_name.data
        product.price = form.product_price.data
        product.category_id = form.category.data
        db.session.commit()
        flash("商品情報を更新しました", "success")
        return redirect(url_for("product_list"))

    return render_template("product_form.html", form=form, title="商品編集フォーム")
product_form.html
<!DOCTYPE html>
<html lang="ja">

<head>
    <meta charset="UTF-8">
    <meta name="viewport" content="width=device-width, initial-scale=1.0">
    <title>{{ title }}</title>
    <link rel="stylesheet" href="{{ url_for('static', filename='css/style.css') }}">
</head>

<body>

    <ul>
        <li><a href="{{ url_for('product_list') }}" class="button-link">商品一覧に戻る</a></li>
        <li><a href="{{ url_for('manage_products') }}" class="button-link">商品管理ページ</a></li>
    </ul>

    <h1>{{ title }}</h1>

    <form method="POST" action="{{ url_for('add_product') }}">
        {{ form.hidden_tag() }} <!-- CSRFトークンを含めるため -->

        <label for="product_name">商品名</label>
        {{ form.product_name() }} <!-- 商品名入力フィールド -->
        {% if form.product_name.errors %}
        <ul>
            {% for error in form.product_name.errors %}
            <li>{{ error }}</li>
            {% endfor %}
        </ul>
        {% endif %}

        <label for="product_price">価格</label>
        {{ form.product_price() }} <!-- 価格入力フィールド -->
        {% if form.product_price.errors %}
        <ul>
            {% for error in form.product_price.errors %}
            <li>{{ error }}</li>
            {% endfor %}
        </ul>
        {% endif %}

        <label for="category">カテゴリー</label>
        {{ form.category() }}
        {% if form.category.errors %}
        <ul>
            {% for error in form.category.errors %}
            <li>{{ error }}</li>
            {% endfor %}
        </ul>
        {% endif %}

        <input type="submit" value="商品を登録する">
    </form>

</body>

</html>
変更後の表示
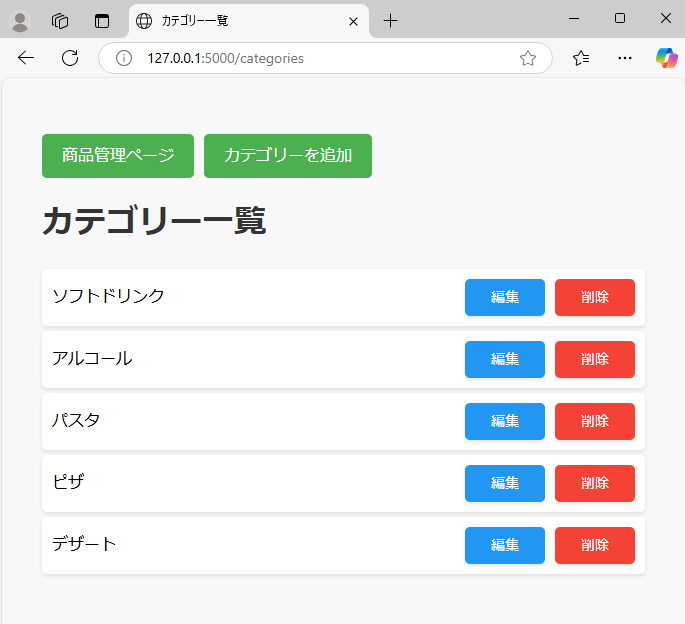
categories.html
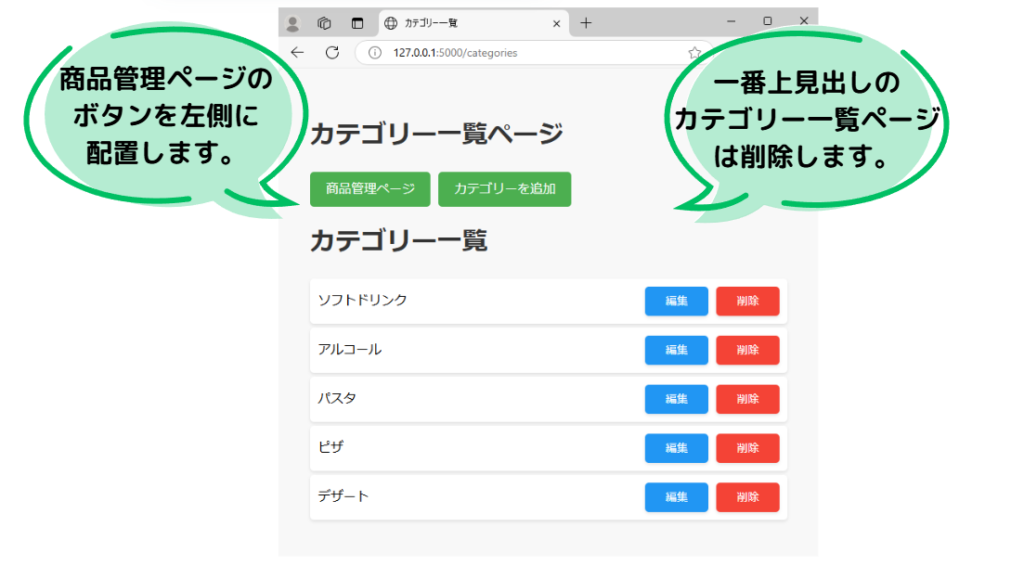
ブラウザの<title>タグ部分は見出し<h1>タグ部分と揃えます(カテゴリー一覧)。この部分はapp.pyにある render_template() のtitle引数に指定し、テンプレート側で{{ title }}で読み込みます。
app.py
# カテゴリー一覧を表示
@app.route("/categories")
def category_list():
    categories = Category.query.all()
    return render_template("categories.html", categories=categories, title="カテゴリー一覧")
categories.html
<!DOCTYPE html>
<html lang="ja">

<head>
    <meta charset="UTF-8">
    <title>{{ title }}</title>
    <link rel="stylesheet" href="{{ url_for('static', filename='css/style.css') }}">
</head>

<body>
    <ul>
        <li><a href="{{ url_for('manage_products') }}" class="button-link">商品管理ページ</a></li>
        <li><a href="{{ url_for('add_category') }}" class="button-link">カテゴリーを追加</a></li>
    </ul>
    <h1>{{ title }}</h1>
    <ul>
        {% for category in categories %}
        <li class="category-item">
            <span class="category-name">{{ category.name }}</span>
            <div class="button-group">
                <form action="{{ url_for('edit_category', category_id=category.id) }}" method="GET">
                    <button type="submit" class="edit-button">編集</button>
                </form>
                <form action="{{ url_for('delete_category', category_id=category.id) }}" method="POST">
                    <button type="submit" class="delete-button"
                        onclick="return confirm('本当に削除しますか?※既に商品が存在する場合は削除できません。')">削除</button>
                </form>
            </div>
        </li>
        {% endfor %}
    </ul>
</body>

</html>
変更後の表示
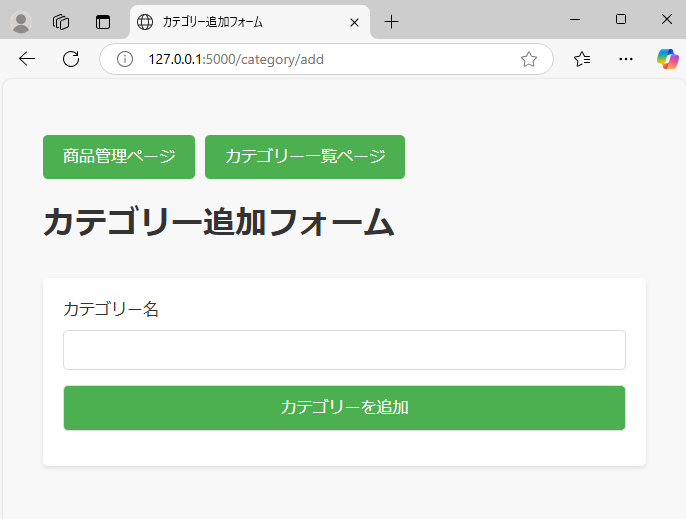
category_form.html
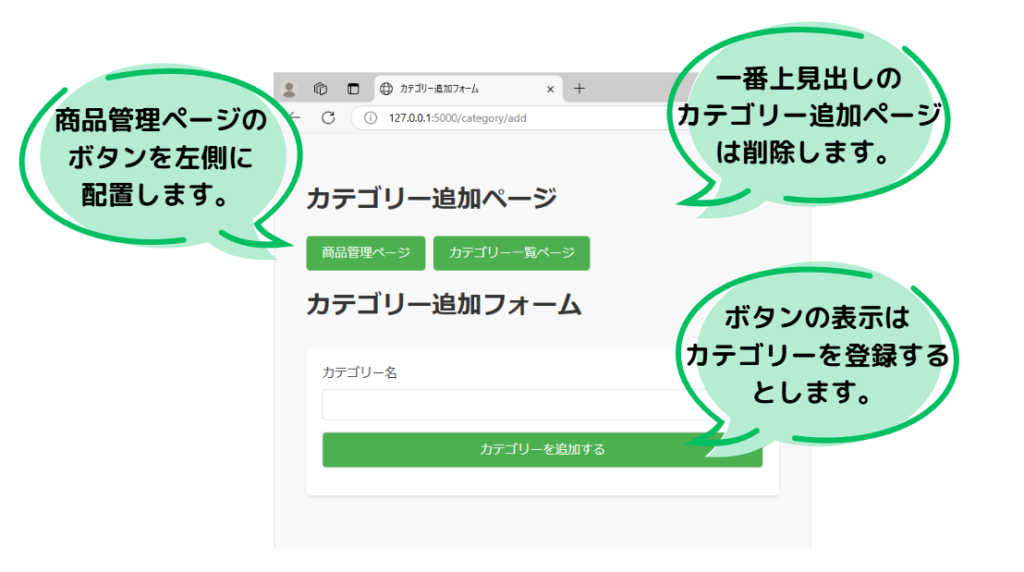
ブラウザの<title>タグ部分は見出し<h1>タグ部分と揃えます(カテゴリー追加フォーム)。この部分はapp.pyにある render_template() のtitle引数に指定し、テンプレート側で{{ title }}で読み込みます。
送信ボタン部分の文言はforms.pyのCategoryFormクラスにあるSubmitFieldで指定します。今回は「カテゴリーを追加」としています。
app.py
# カテゴリーを追加
@app.route("/category/add", methods=["GET", "POST"])
def add_category():
    form = CategoryForm()
    if form.validate_on_submit():
        new_category = Category(name=form.name.data)
        db.session.add(new_category)
        db.session.commit()
        flash("カテゴリーを追加しました", "success")
        return redirect(url_for("category_list"))
    return render_template(
        "category_form.html", form=form, title="カテゴリー追加フォーム"
    )
forms.py
class CategoryForm(FlaskForm):
    name = StringField("カテゴリー名", validators=[DataRequired()])
    submit = SubmitField("カテゴリーを追加")
category_form.html
<!DOCTYPE html>
<html lang="ja">

<head>
    <meta charset="UTF-8">
    <title>{{ title }}</title>
    <link rel="stylesheet" href="{{ url_for('static', filename='css/style.css') }}">
</head>

<body>
    <ul>
        <li><a href="{{ url_for('manage_products') }}" class="button-link">商品管理ページ</a></li>
        <li><a href="{{ url_for('category_list') }}" class="button-link">カテゴリー一覧ページ</a></li>
    </ul>
    <h1>{{ title }}</h1>
    <form method="POST">
        {{ form.hidden_tag() }}
        <label for="name">カテゴリー名</label>
        {{ form.name() }}
        {% for error in form.name.errors %}
        <p style="color: red;">{{ error }}</p>
        {% endfor %}
        {{ form.submit(class="button-link") }}
    </form>
</body>

</html>
変更後の表示
今回は以上になります。


ブックマークのすすめ
「ほわほわぶろぐ」を常に検索するのが面倒だという方はブックマークをお勧めします。ブックマークの設定は別記事にて掲載しています。


-640x360.jpg)


-640x360.jpg)


重要用語-320x180.jpg)

多変量解析-320x180.jpg)
基本統計量-320x180.jpg)