
目標
「Pythonの概要」について理解する。
「Windows11へのPythonのインストール方法」について理解して行える。
Pythonの概要
Pythonの概要
Pythonとは
「python」は1990年代から存在するプログラミング言語です。「python」には次のような特徴があります。
- オープンソースで配布されている。(無料で利用できます。)
- ソースが公開されている。(プログラム自体を調べることが可能)
- ライブラリが豊富で幅広い分野で利用される。
- 機械学習
- ディープラーニング
- データ分析
- Web開発
- Windows、Mac、LinuxOSを問わず利用できる。
- 様々なプログラミングパラダイムに対応している。
pythonは現在、「pythonソフトウェア財団」によって開発・サポートされています。
この記事では実際に、「pythonソフトウェア財団」のサイトページからpythonをインストールしていきます。
Pythonのインストール手順(Windows11)
Pythonのインストール手順(Windows11)
Pythonのインストール手順(Windows11)
Pythonのインストール状況確認
「python」が既にインストールされているかを確認します。コマンドプロンプトを立ち上げて「python -V」と入力します。コマンドプロンプトの起動方法が分からない場合は次の記事を参考にしてください。
「python」がインストールされていなければ次のように表示されます。
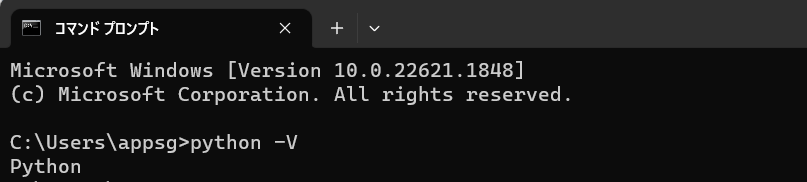
「python」がインストールされていると「Pythonのバージョン」が表示されます。

Windowsアーキテクチャの確認
環境にあったpythonのインストールを行うためにWindowsのアーキテクチャの確認を行います。PCのアーキテクチャが64bitであれば64bitのpythonをダウンロードし、32bitであれば32bitのpythonをダウンロードします。
PCの64bit、32bitに関してはWindowsのスタートメニュー>ユーザーアイコン>アカウント設定の変更>システム>バージョン情報で確認できます。
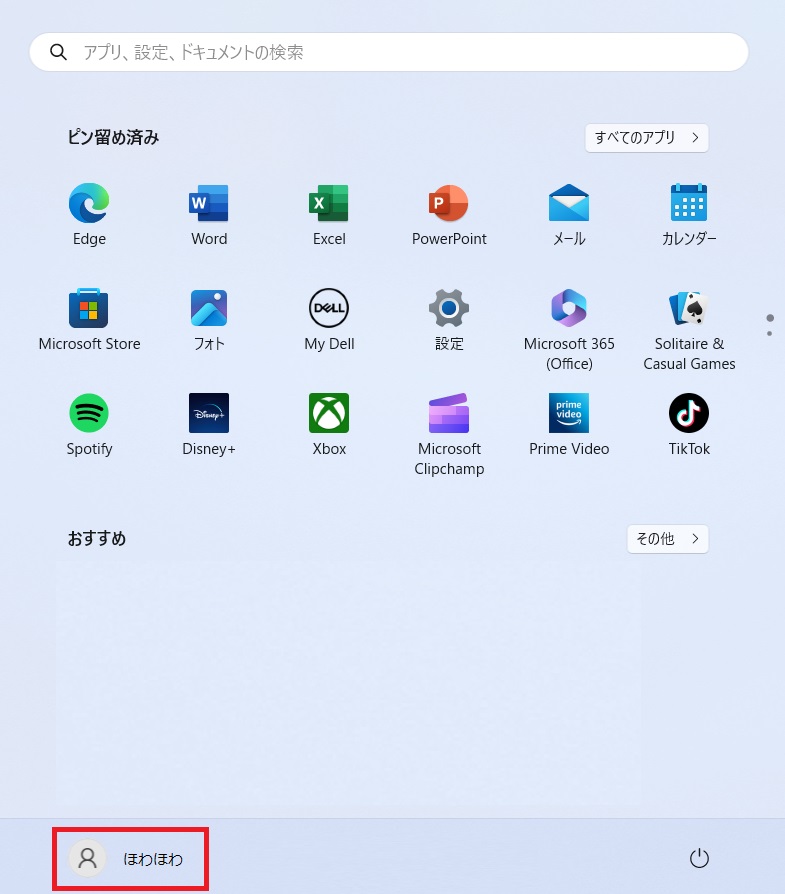
タスクバーにある「スタートメニュー」をクリックします。

「アカウント名」をクリックします。この記事では「ほわほわ」です。
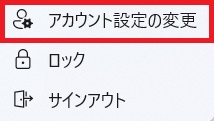
表示されるメニューから「アカウント設定の変更」をクリックします。
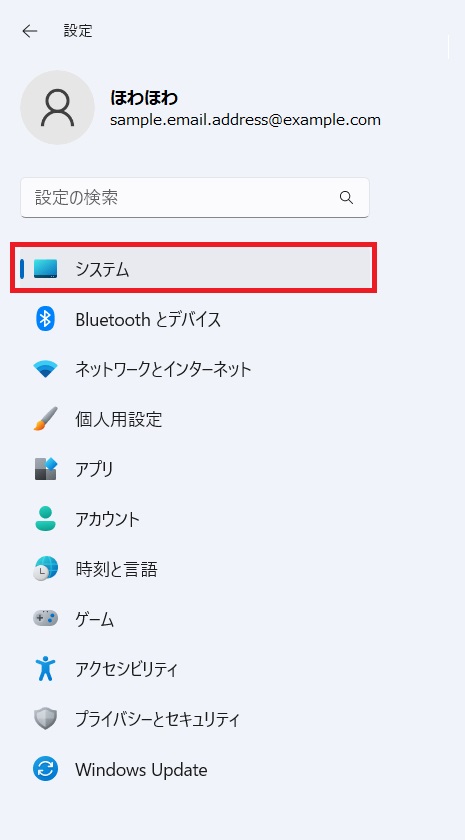
アカウント設定の画面が表示されたら左メニューから「システム」を選択します。
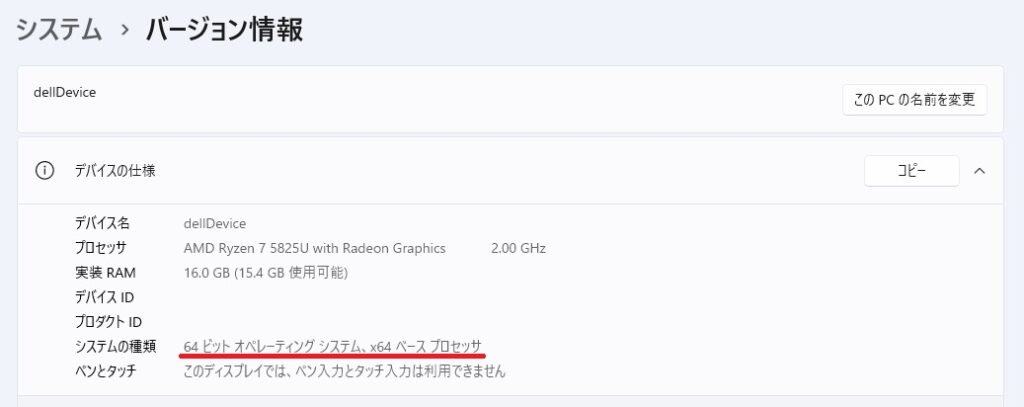
システムの設定項目から「バージョン情報」をクリックします。

「デバイスの仕様」から「システムの種類」を確認します。「64ビットオペレーティングシステム、x64ベースプロセッサ」が確認できます。
Pythonのダウンロード
「Pythonのインストール」を行うにはまず「pythonのダウンロード」を行う必要があります。pythonのダウンロードはpythonソフトウェア財団のページから行います。pythonソフトウェア財団のページはこちら(https://www.python.org/)になります。
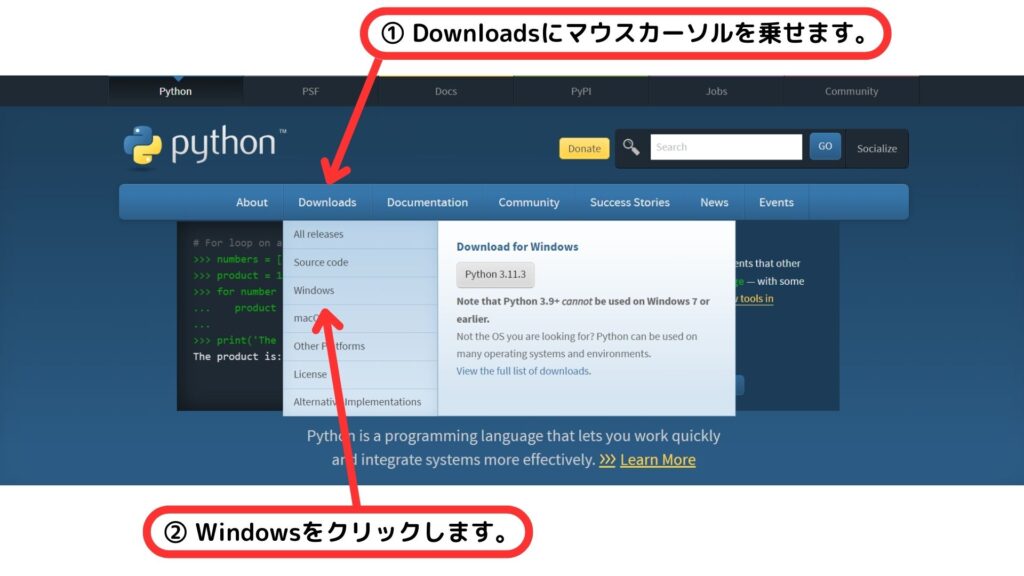
URLへアクセスすると下のキャプチャのように表示されます。
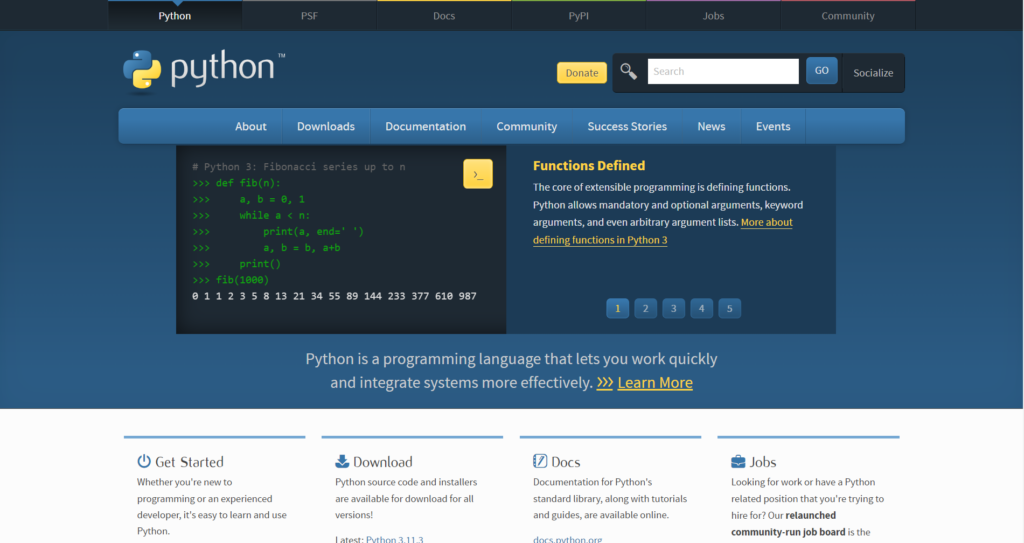
「Download」をマウスホバーすると「Windows」とかかれたプルダウンメニューが表示されます。「Windows」をクリックします。
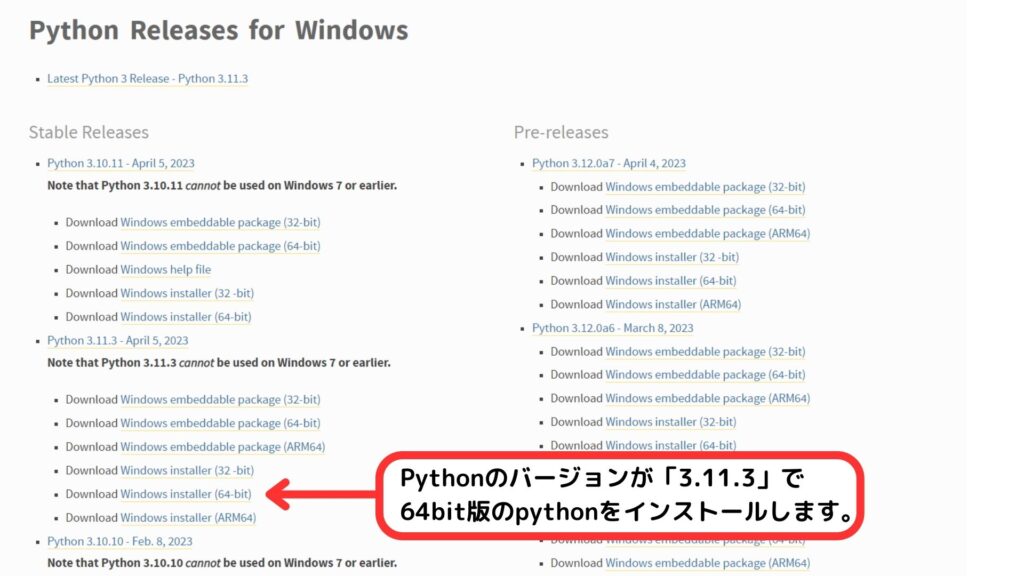
「Windows」をクリックするとpythonのダウンロードファイルのリストが表示されます。インストールには安定板(Stable Releases)の列から「Windows installer(64bit)」を選択して行います。(この記事では「python3.11.3のWindows installer(64bit)」をダウンロードしています。
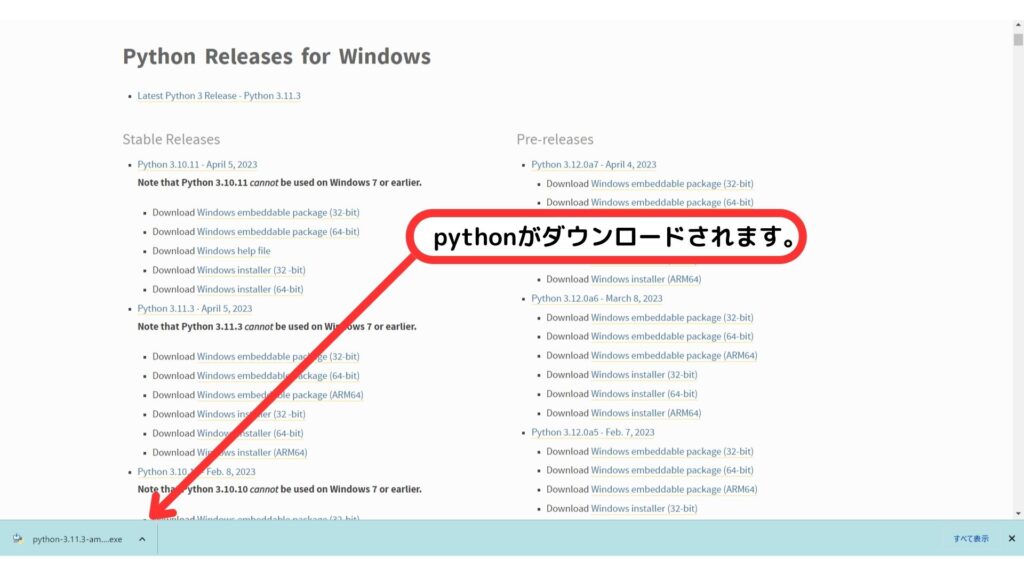
リンクをクリックするとダウンロードが行われます。
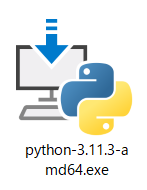
ダウンロードされたファイルを開きます。
「このアプリがデバイスに変更を加えることを許可しますか?」と聞かれます。「はい」をクリックすると下のキャプチャのようなインストール準備のポップアップが表示されます。
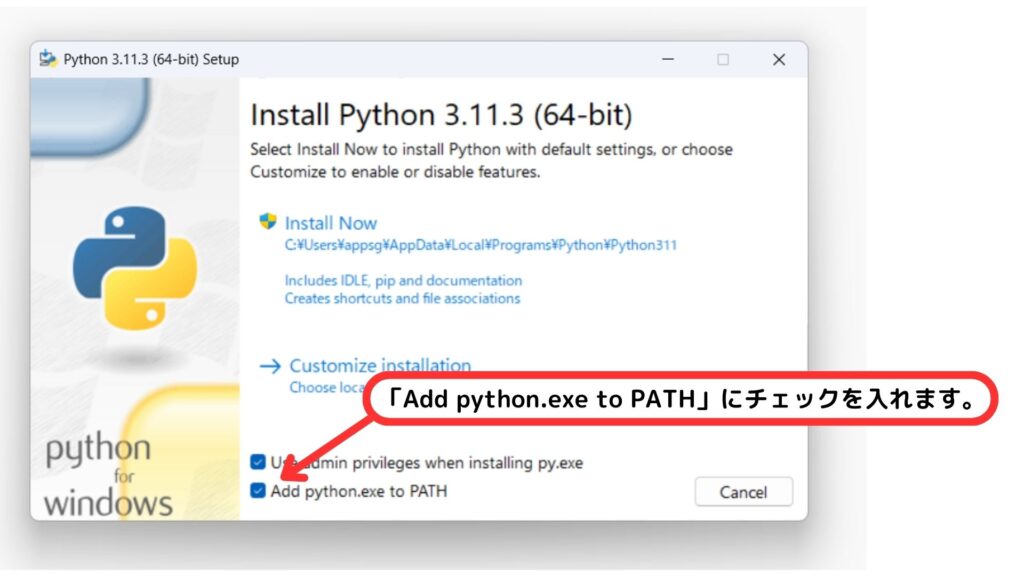
「Add python.exe to PATH」にチェックを入れます。ここにチェックを入れるとpythonがインストールされるディレクトリが環境変数のPATHに登録されます。これによってインストールされたディレクトリ以外でもpythonの利用が可能になります。基本的にはチェックを入れると考えて問題ありません。
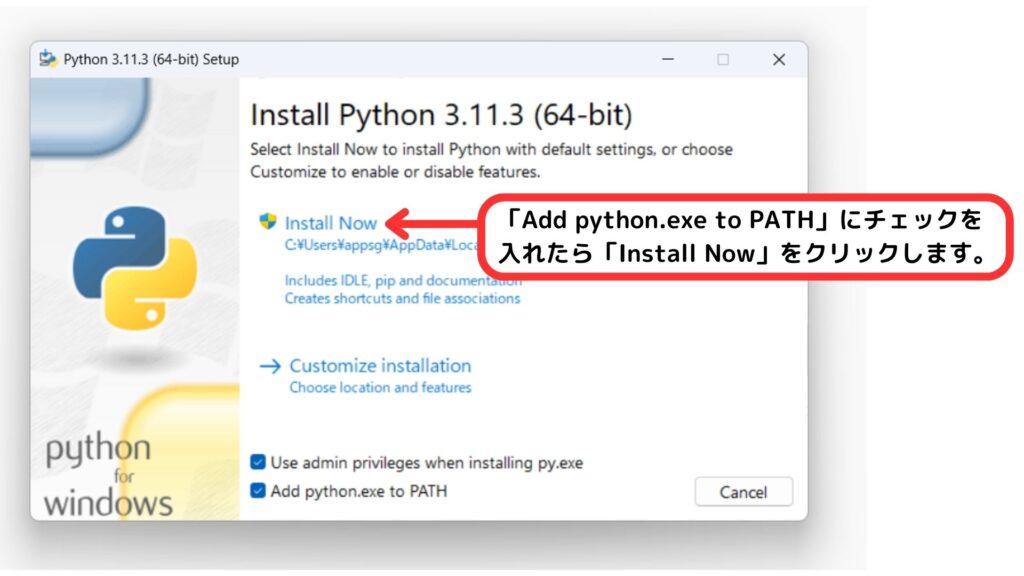
「Add python.exe to PATH」にチェックを入れたら「Install Now」をクリックします。
インストールが終了すると次の表示になります。「Close」をクリックします。

インストールの状況を確認します。コマンドプロンプトを再度開き直して「python -V」と入力します。バ―ションが表示されていれば成功です。

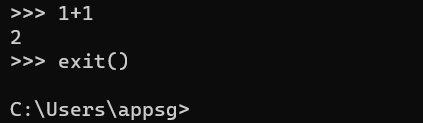
実行できるか確認してみたいと思います。コマンドプロンプトで「python」と入力します。プロンプトの表示が「>>>」と変わります。

「1+1」と入力してみます。pythonが動いて「2」と返って次の入力が求められます(新しく「>>>」と表示される)。python consoleから抜ける場合は「exit()」と入力します。
pythonのインストールとインストールの確認はこれで終了です。
今回は以上になります。

ブックマークのすすめ
「ほわほわぶろぐ」を常に検索するのが面倒だという方はブックマークをお勧めします。ブックマークの設定は別記事にて掲載しています。

if文-640x360.jpg)
-640x360.jpg)
-2-640x360.jpg)
-640x360.jpg)

カスタム調査とシンジケートデータ-320x180.png)
帰無仮説と対立仮設・有意水準・P値・z検定-320x180.png)
準実験:合成コントロール法-320x180.jpg)
準実験:回帰不連続デザイン(RDD)-320x180.jpg)
準実験:傾向スコアマッチング(PSM)-320x180.jpg)