目標
「WindowsへのVirtual Boxのインストール方法」について理解して行える。
Virtual Boxのインストール手順(Windows)
Virtual Boxのインストール手順(Windows)
Virtual Box インストール前の注意点
Virtual Box インストール前の注意点
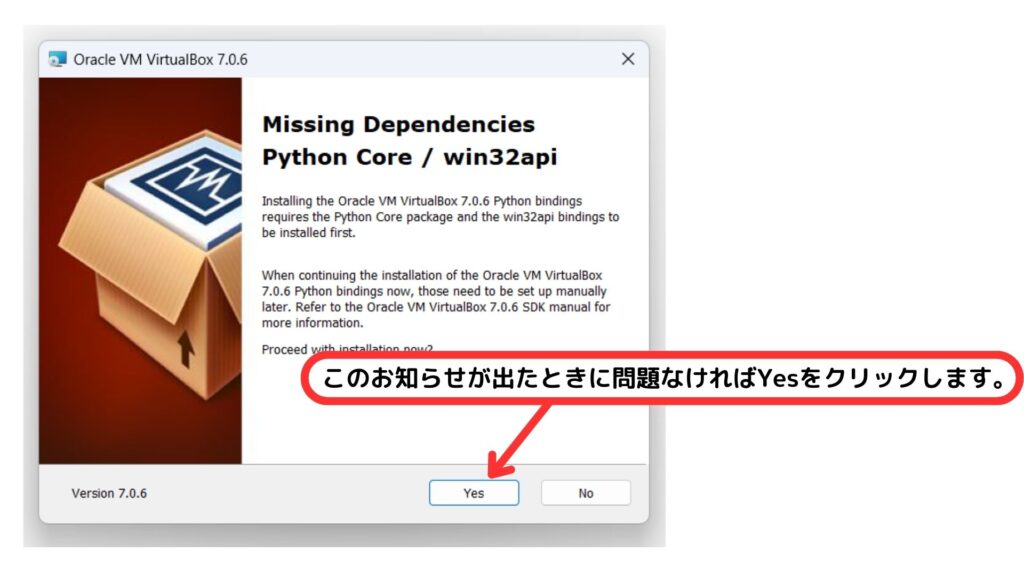
Virtual Boxのインストールで「Virtual Box7」のバージョンをインストールする場合はpythonのインストールがない場合に警告が表示されます。
これは「python」から「Virtual Box」をコントロールできる「Virtual Box7」からの新しい機能に対して利用したい方へのお知らしとしての警告です。
この機能を利用したい場合は「pythonのインストール」と「pywin32」のインストールが必要ですが、普通に利用するだけであれば「Yes」を選択し、そのままインストールして問題はありません。
どうしても気になる場合は「pythonのインストール」を先に行って「pywin32」をpipでインストールしてからVirtual Boxのインストールを行います。
pythonのインストール
「pywin32」のインストール手順
「pywin32」のインストール手順は次の通りです。(pythonのインストール後に行います。)
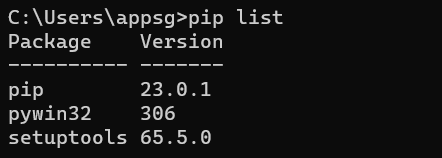
コマンドプロンプトを立ち上げてインストール状況を確認します。「pip list」と入力します。
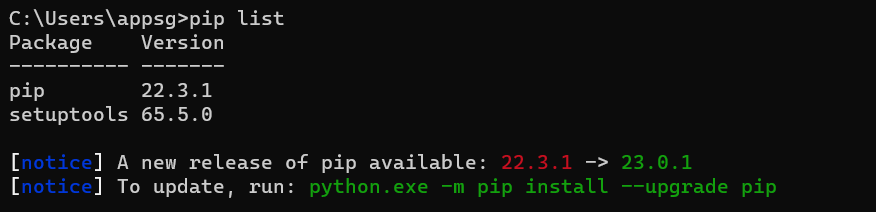
リストには「pip 22.3.1」と「setuptools 65.5.0」のみが表示されているので「pywin32」が無いことが確認できます。
ここで [notice] にある「python.exe -m pip install –upgrade pip」を実行してpipのバージョンを更新します。

最後の行に「Successfully installed pip-バージョン番号」が表示されれば問題なくアップデートは完了しています。
「pywin32」をpipを利用してインストールします。「pip install pywin32」と入力します。

最後の行に「Successfully installed pywin32-番号」が表示されればインストールは完了です。再度インストール状況を確認します。「pip list」と入力します。
「pywin32」がリストに表示されています。
Virtual Box インストーラー の ダウンロード
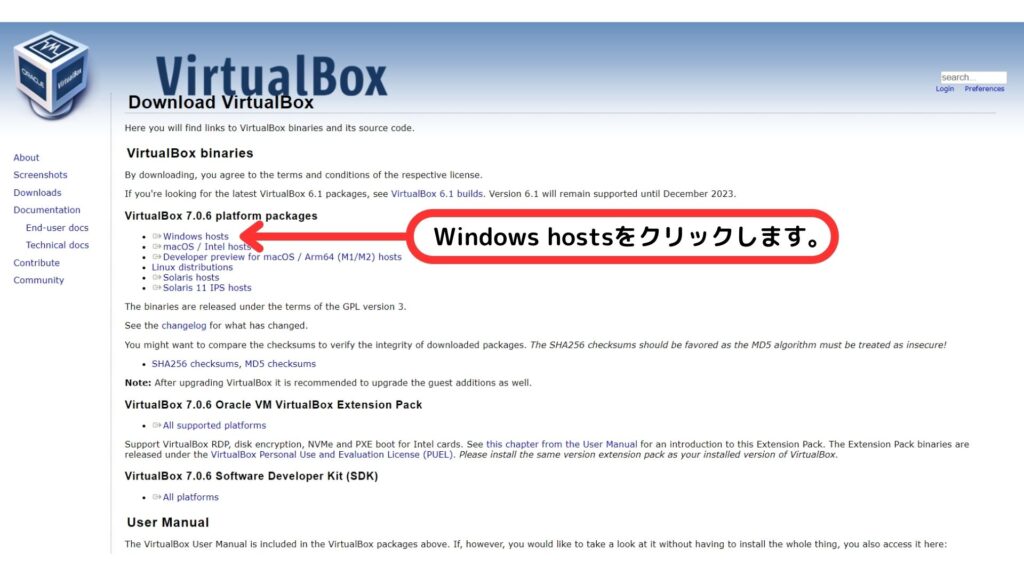
Virtual Boxのインストーラーのダウンロードは次のURLへクセスして行います。(https://www.virtualbox.org/wiki/Downloads)
URLへアクセスすると次のように表示されます。 platform packagesの一覧にある「Windows hosts」をクリックします。
インストーラーのダウンロードページが行われます。

Virtual Box インストーラー の 起動
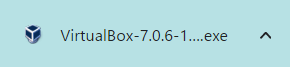
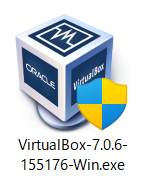
ダウンロードしたインストーラー(下のようなアイコンが付いたexeファイル)を起動します。
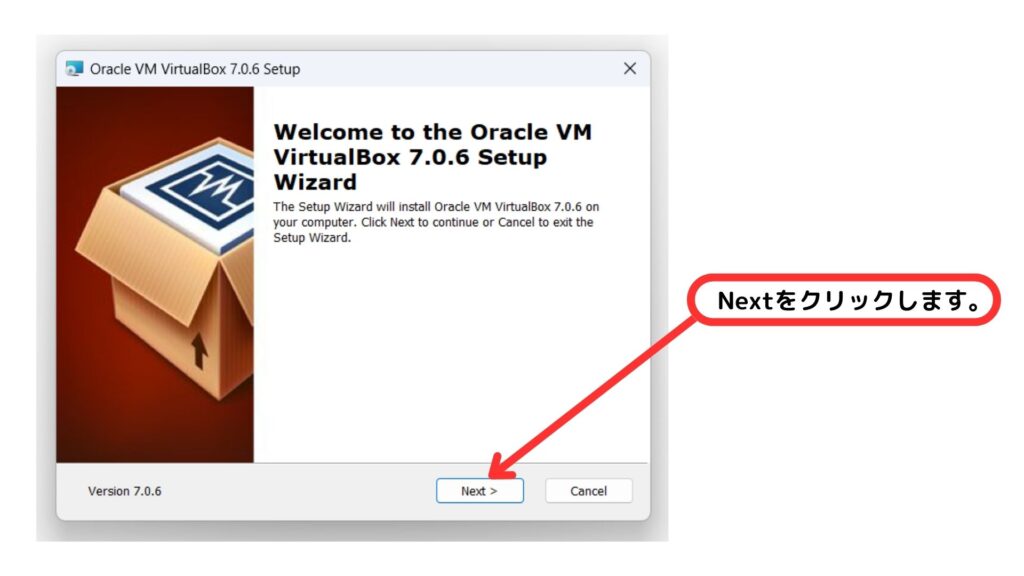
「このアプリがデバイスに変更を加えることを許可しますか?」と聞かれます。「はい」をクリックすると下のようなインストーラーの設定のためのダイアログボックスが表示されます。下のダイアログボックスが表示されたら「Next」をクリックします。
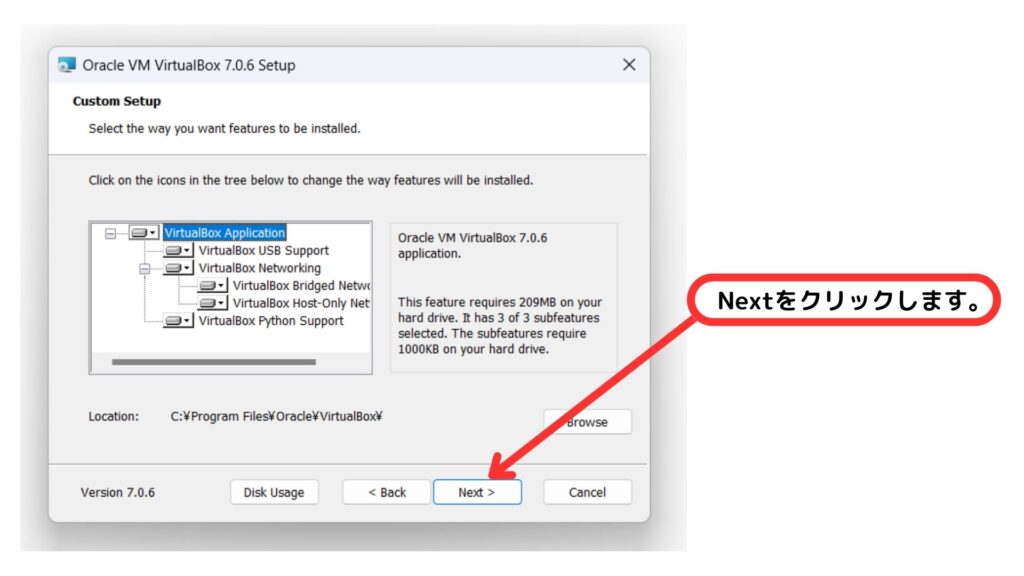
インストールする機能を選択する画面が表示されます。この記事ではデフォルトでインストールを行うので、そのまま「Next」をクリックします。
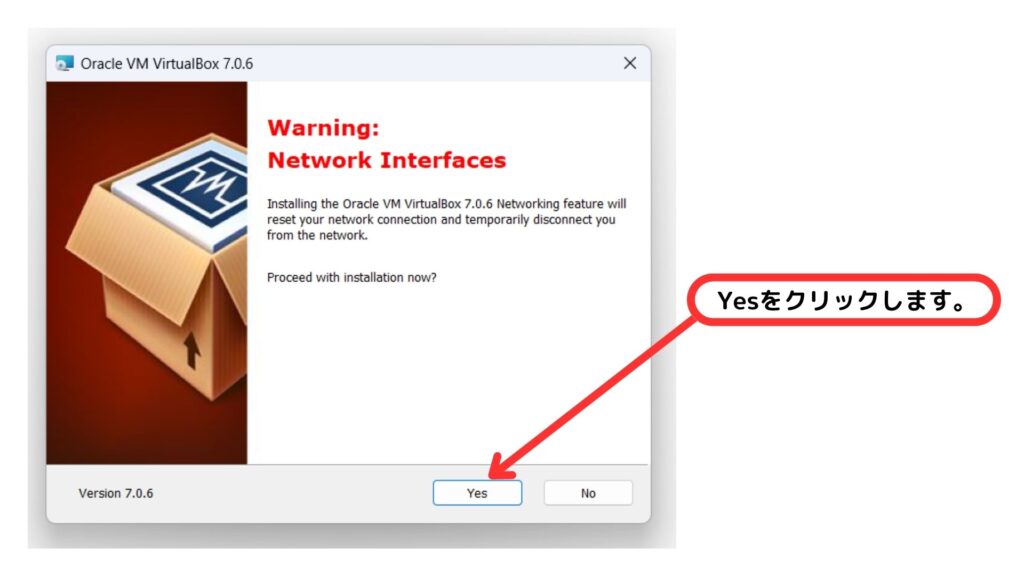
Virtual Boxをインストール中にネットワークのリセットのために一時的に通信が切れることの警告が表示されます。
「python」のインストールと「pywin32」のインストールが行われていないと次の画面が表示されます。

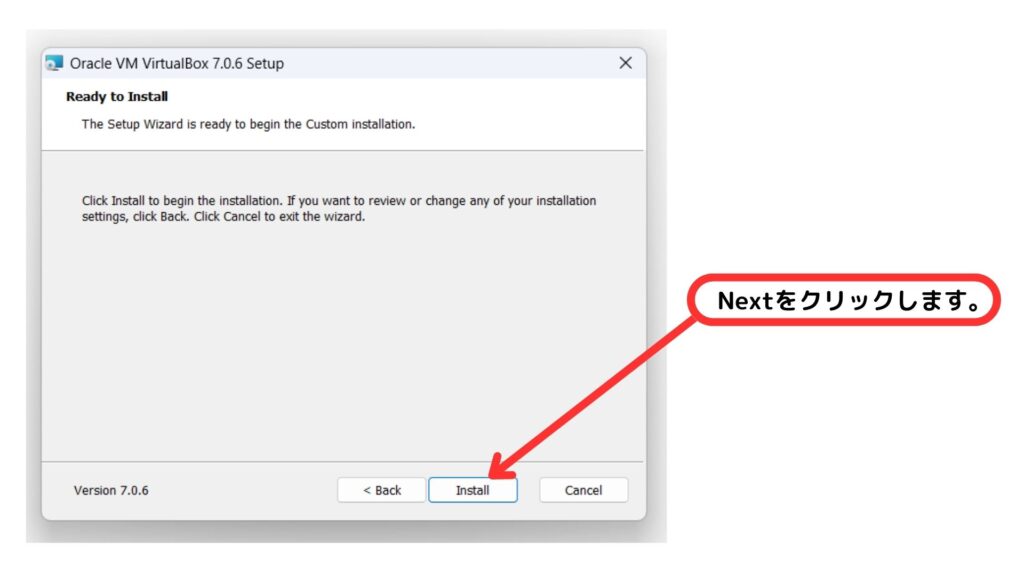
インストール開始のポップアップが表示されます。「Install」をクリックします。
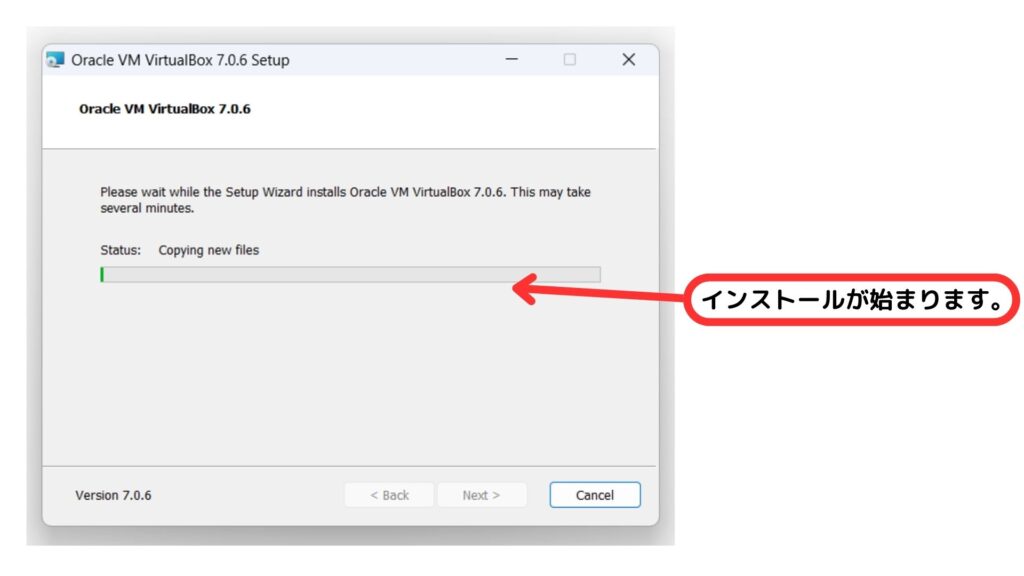
インストールが開始されます。
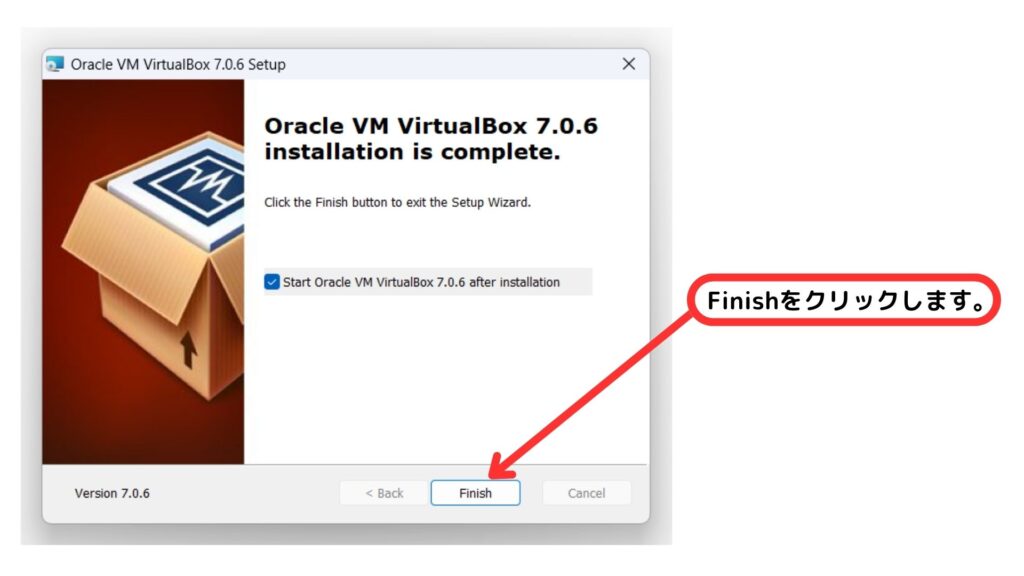
インストールが完了すると次の画面が表示されるので「Finish」をクリックします。
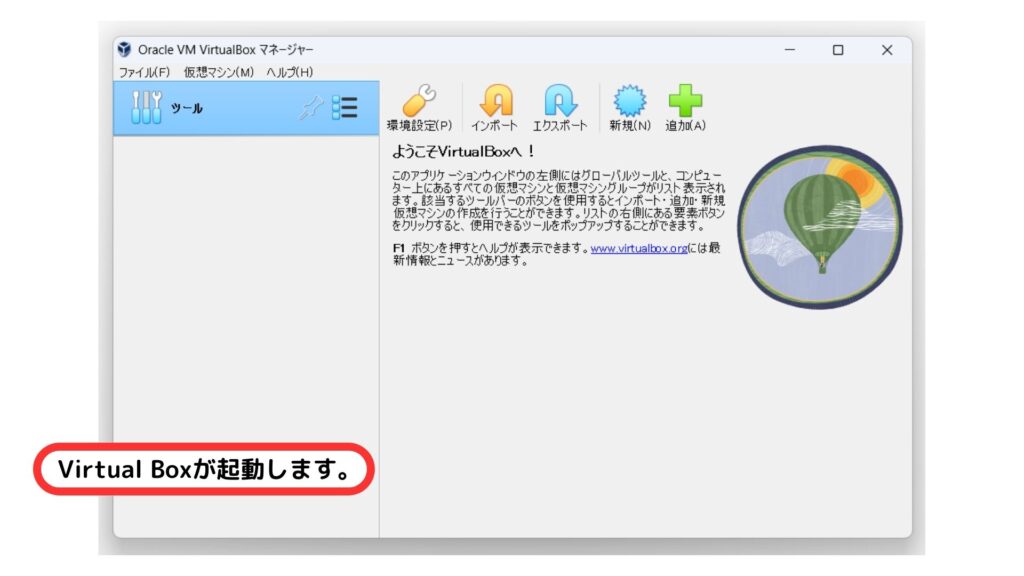
Virtual Boxが起動します。
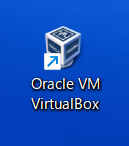
デフォルトの設定でインストールを行うとデスクトップにショートカットアイコンが作成されているので次回以降はこのアイコンをダブルクリックすることで起動ができます。
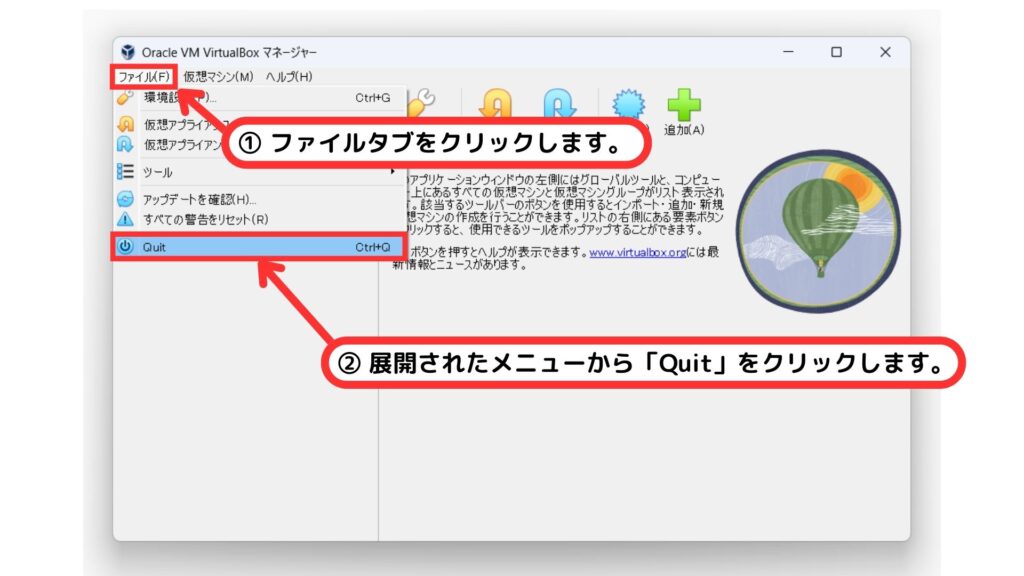
Virtual Boxを終了する時は「ファイル」タブ>「Quit(終了)」を選択します。
Virtual Boxのインストールとインストール後のアプリケーションの起動と終了操作は以上です。今回は以上になります。


ブックマークのすすめ
「ほわほわぶろぐ」を常に検索するのが面倒だという方はブックマークをお勧めします。ブックマークの設定は別記事にて掲載しています。

-640x360.jpg)
-640x360.jpg)
-640x360.jpg)


カスタム調査とシンジケートデータ-320x180.png)
帰無仮説と対立仮設・有意水準・P値・z検定-320x180.png)
準実験:合成コントロール法-320x180.jpg)
準実験:回帰不連続デザイン(RDD)-320x180.jpg)
準実験:傾向スコアマッチング(PSM)-320x180.jpg)